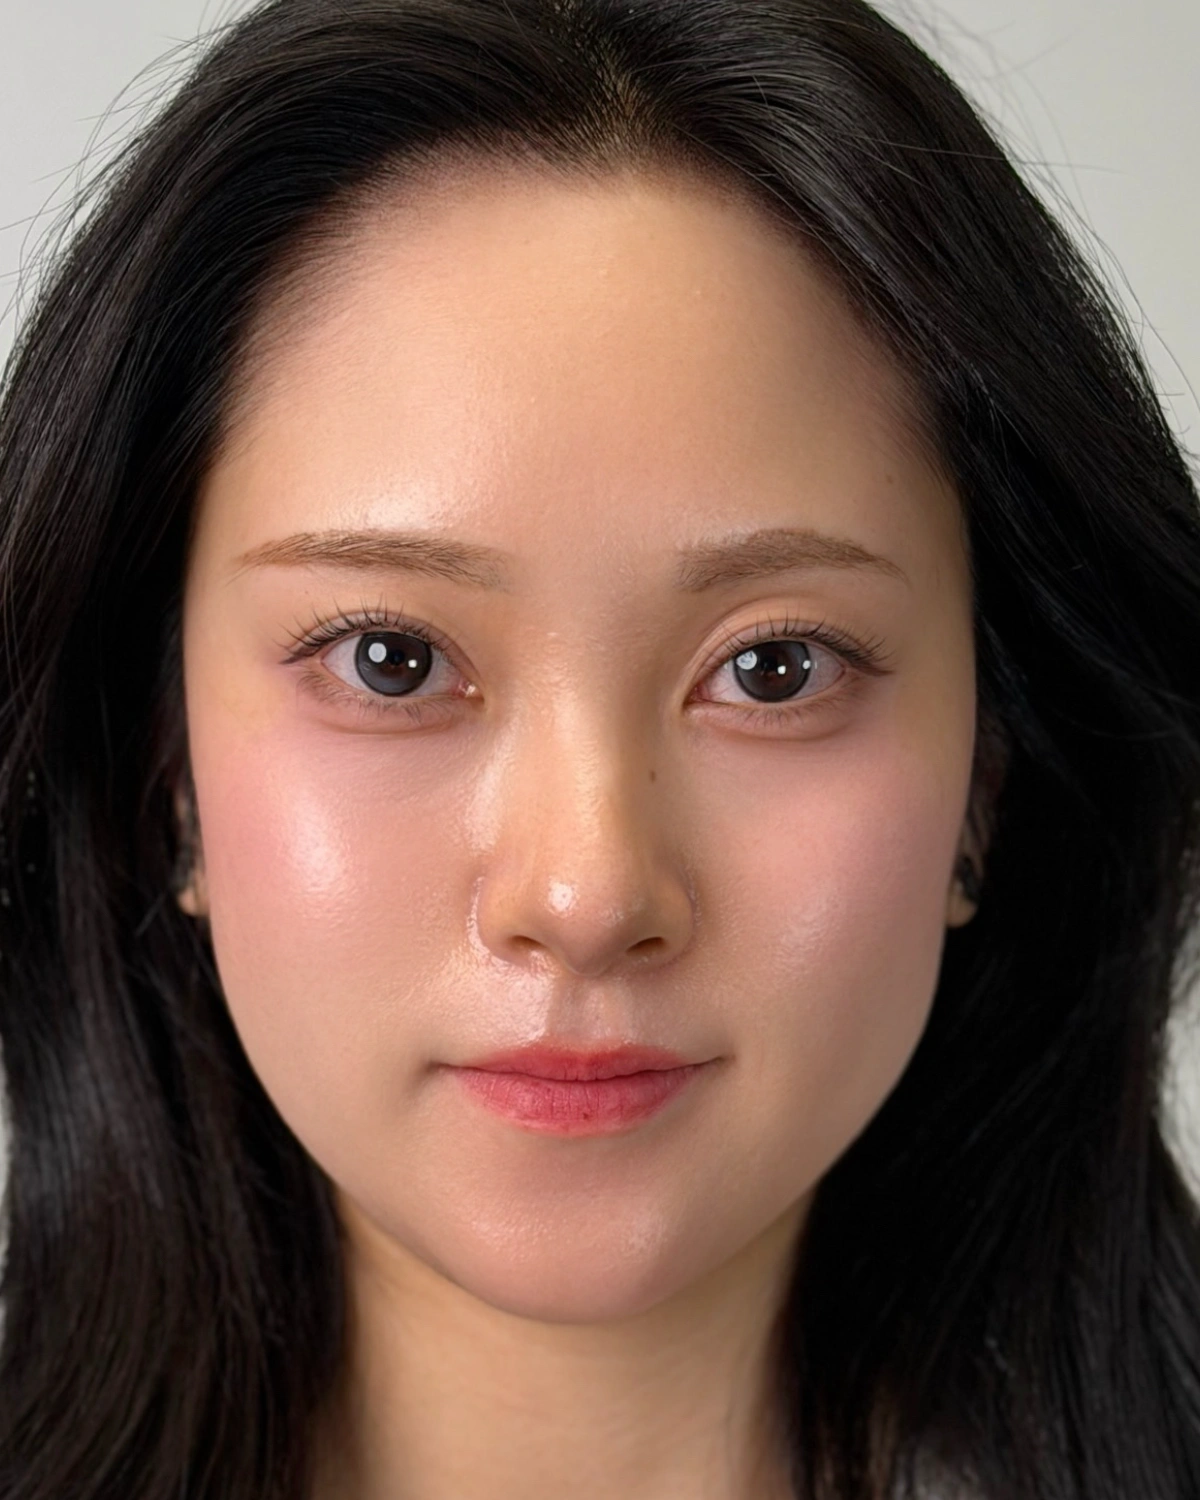
From scalp to hairlineScalp micropigmentation
- Duration
- 2–4 hours
- Longevity
- Varies with skin and lifestyle
- Price
- From ₩550,000
- Sessions
- Assessed by area and healing
More than filling gaps, restoring confidence
A visible parting and a receding hairline need different plans. Dot size, spacing and tone are chosen to blend with the hair already present.
Scalp coverage and hairline shape: different goals
Feel at ease with your parting and forehead
Once you start noticing your crown or hairline, you may find yourself checking it several times a day.
You examine it in every mirror, worry that bright lighting makes your scalp more visible, and instinctively touch your hair when the wind blows.
In photographs or when you lower your head, it can feel as though everyone is looking at your hair.
At the crown, we create natural-looking density by matching existing hair roots in size and colour. For the hairline, we consider overall facial proportions to create a flattering forehead contour and the appearance of a smaller face.
We build coverage that blends naturally with your own hair roots, even up close.
The purpose goes beyond adding colour to the scalp: it is to reduce the moments you spend worrying about it.
1. Feeling more comfortable starts with peace of mind
Have you worried about hair fibres or cover products washing away with sweat or rain, or looking obvious up close?
So that checking your hair is no longer the first thing you do before exercise, meeting someone or an important occasion.
We help replace the daily worry about coverage disappearing with greater confidence.
2. A sparse parting can look fuller
We carefully fill visible scalp around the crown and parting with impressions that match the colour and size of existing hair roots.
Reducing the contrast between scalp and hair makes sparse areas appear denser and more even.
3. A broad forehead can look more balanced
We do not simply lower the hairline. We assess face shape, forehead height and gaps at the temples to design a natural contour. This can help a broad face appear smaller, a long face appear shorter, or balance a wide forehead.
Refining excess forehead space can balance the face's vertical and horizontal proportions, making it appear smaller and softer. It can also reduce the need for daily contour makeup.
4. Wear your hair up more comfortably
If exposing your forehead and temples makes you self-conscious when tying your hair back, we connect sparse areas naturally with your existing hair pattern.
You can feel more comfortable choosing your hairstyle, even on windy days, without relying on a fringe or pulling strands down beside your face.
Which concerns would you like to address?
If any of these sound familiar
- 01“My crown or parting looks sparse.”
- 02“Hair fibres rub off and stain my pillow.”
- 03“Transplant scars stop me from wearing my hair short.”
- 04“My broad forehead makes my face look larger.”
- 05“My forehead looks bare when I tie my hair back.”
- 06“Without fine hairs, my hairline looks too rigid.”
Crown density, parting or hairline design?
Which approach suits you?
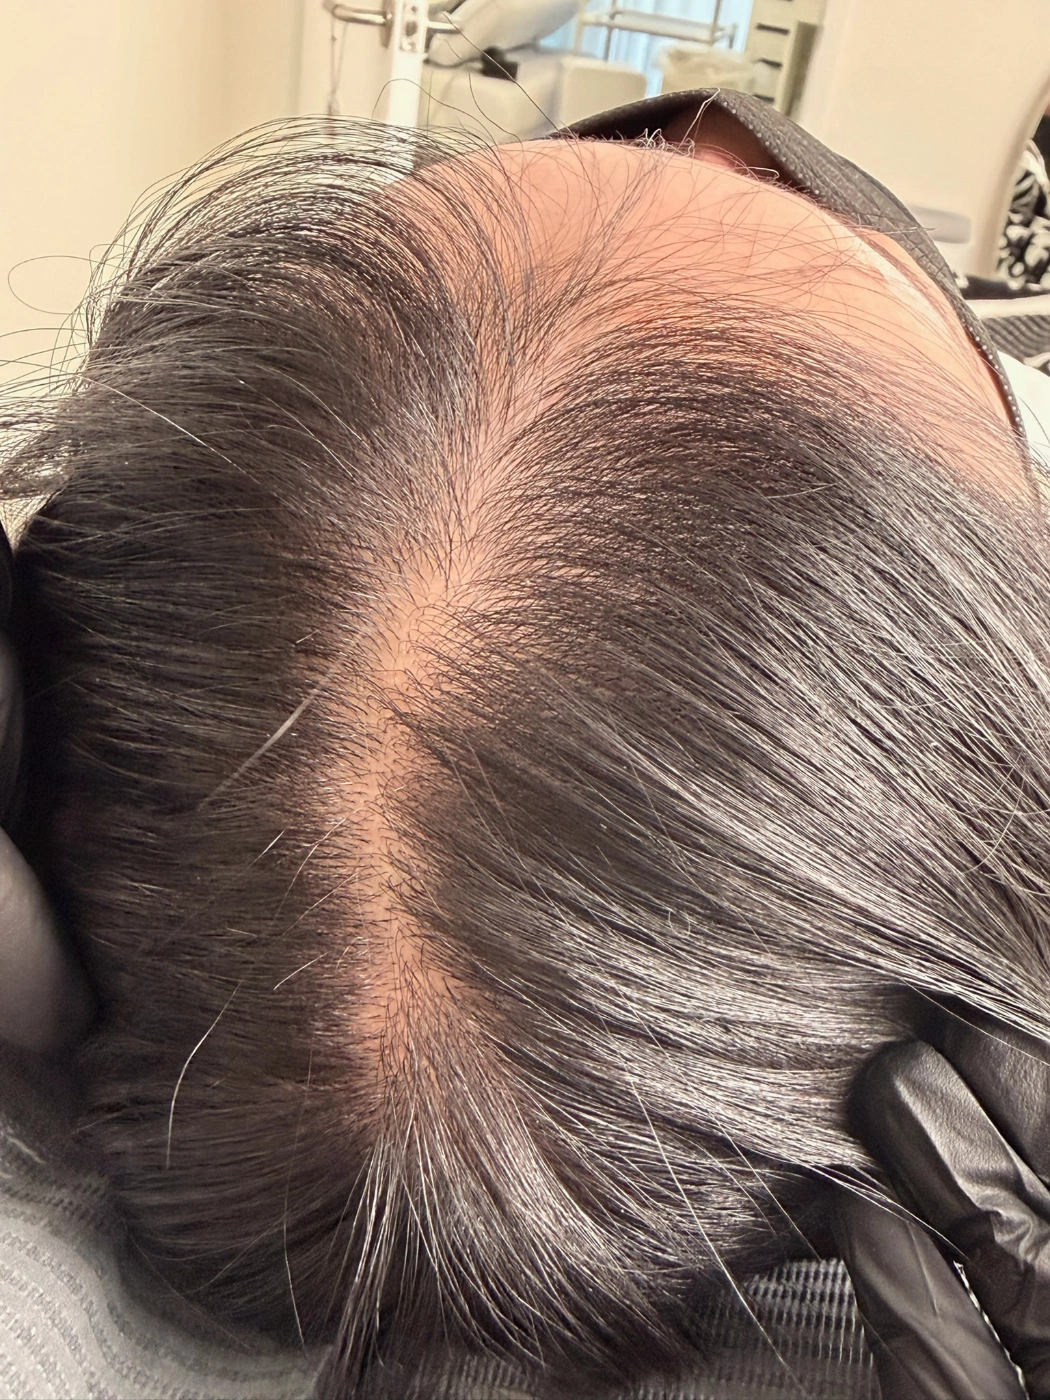
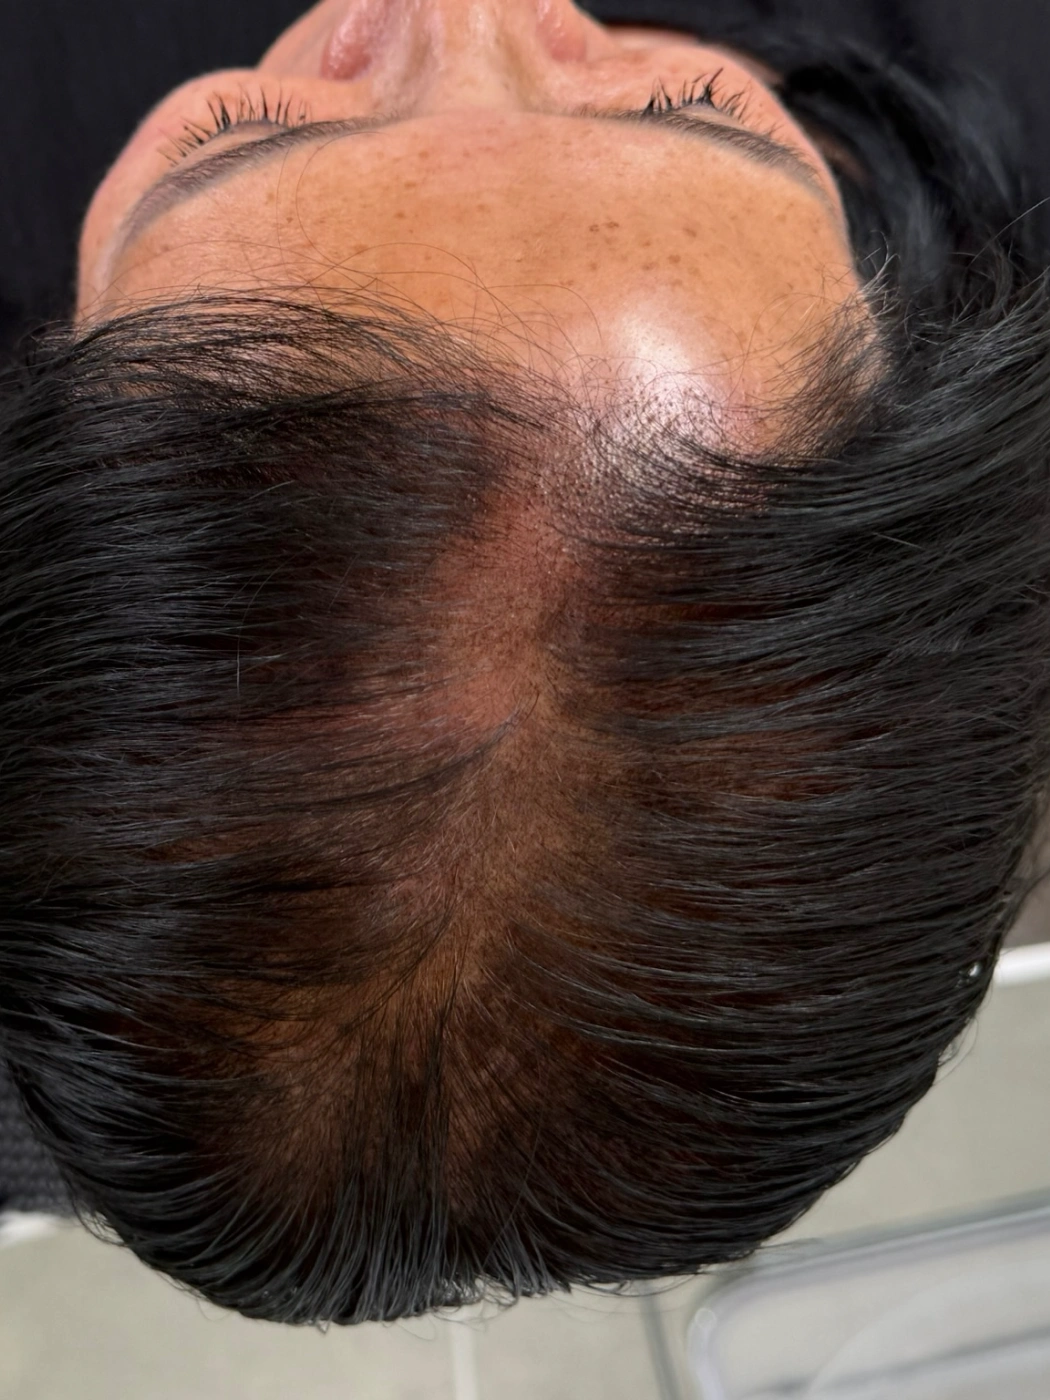
Density enhancement
When scalp shows through at the crown or parting
We fill between remaining hairs with a matching tone to reduce scalp visibility. Dot size is adjusted to hair thickness.
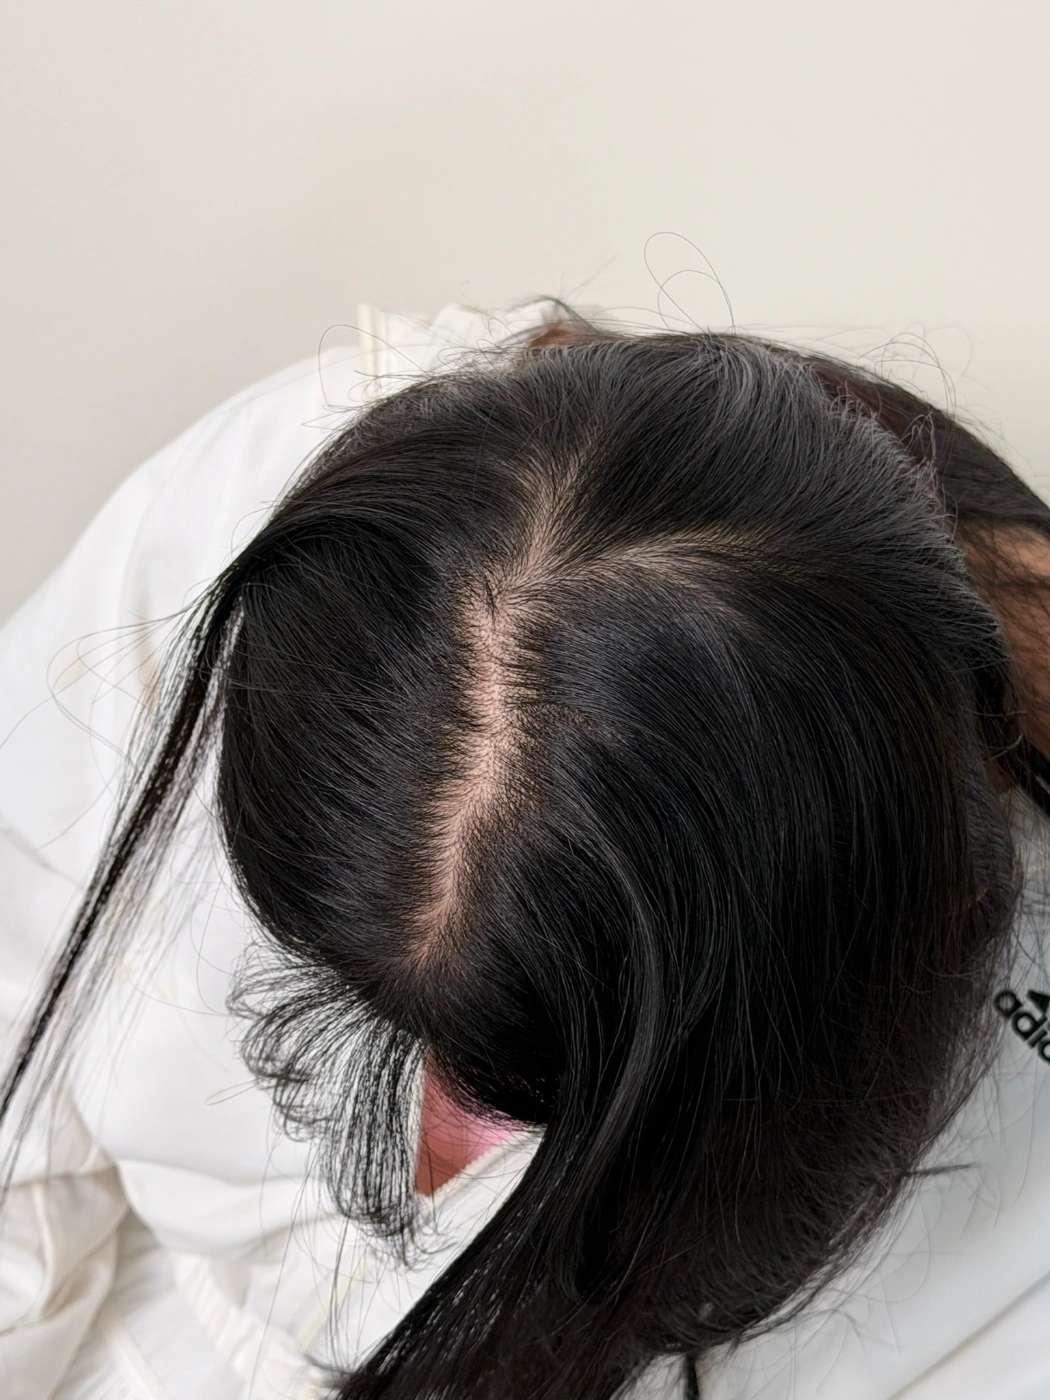
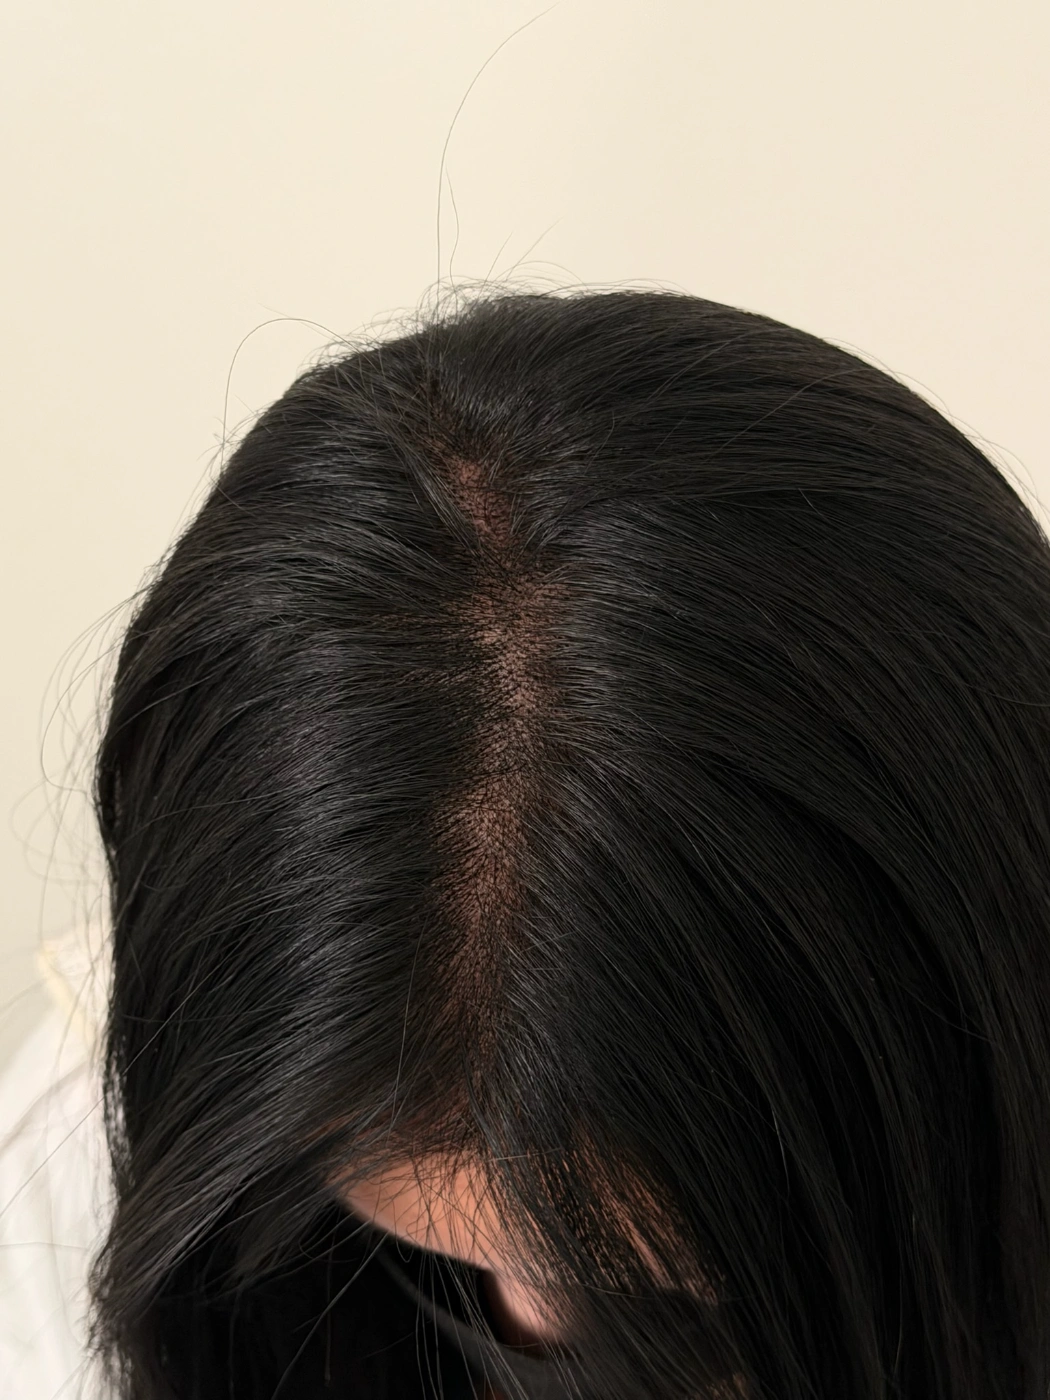
Parting refinement
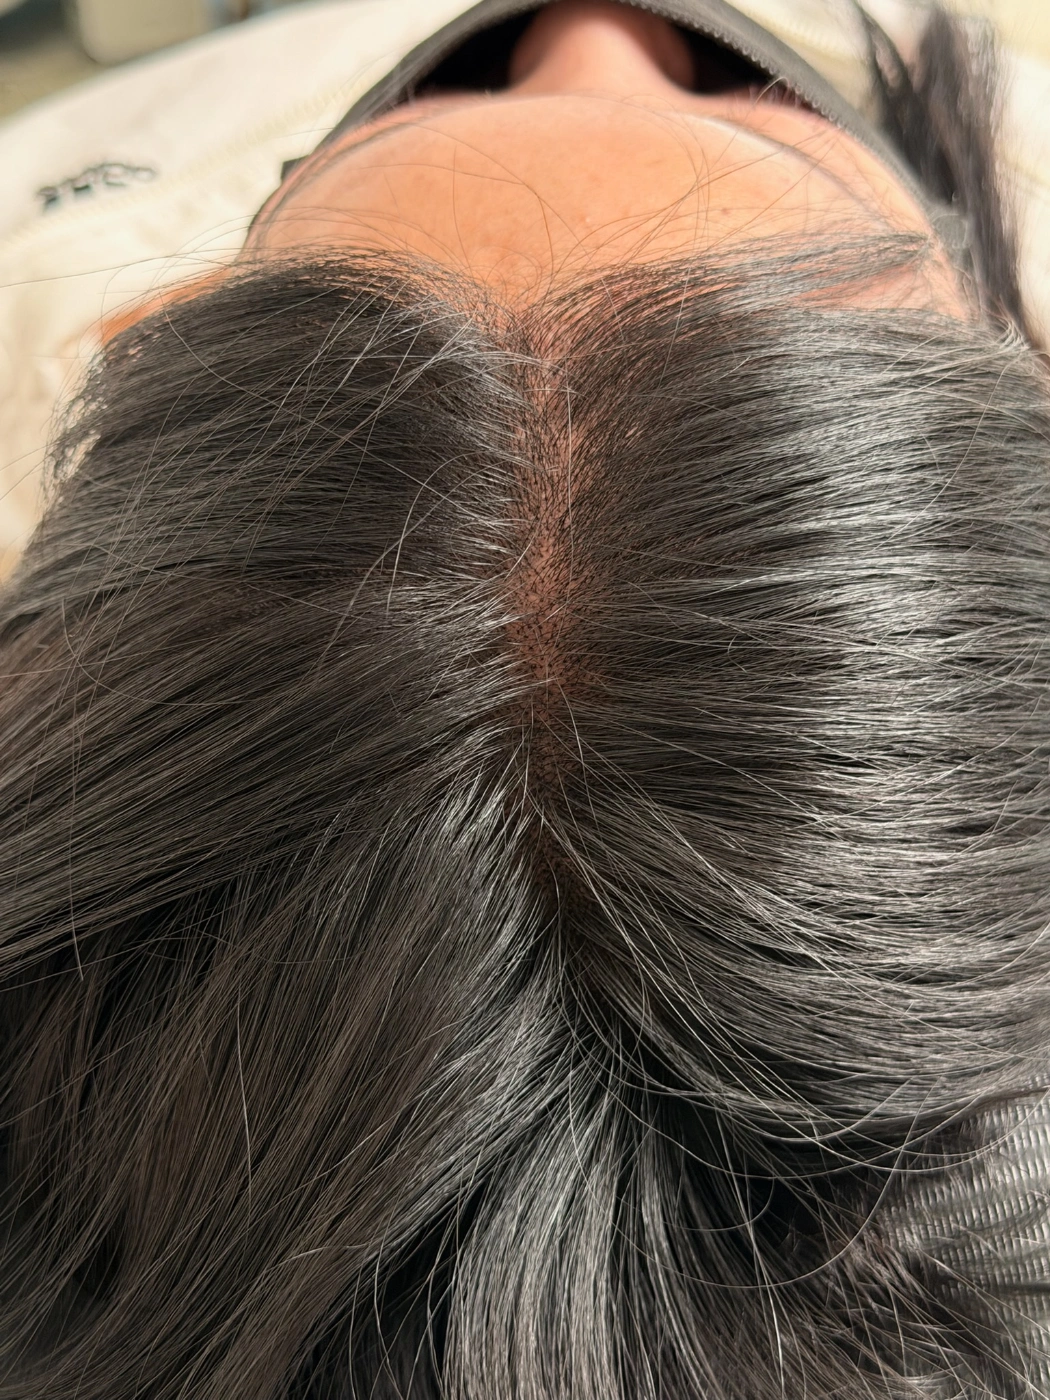
When a widening parting exposes the scalp
Small dots add density on both sides of the parting to reduce its apparent width. Filling with a solid line can leave a visible mark.
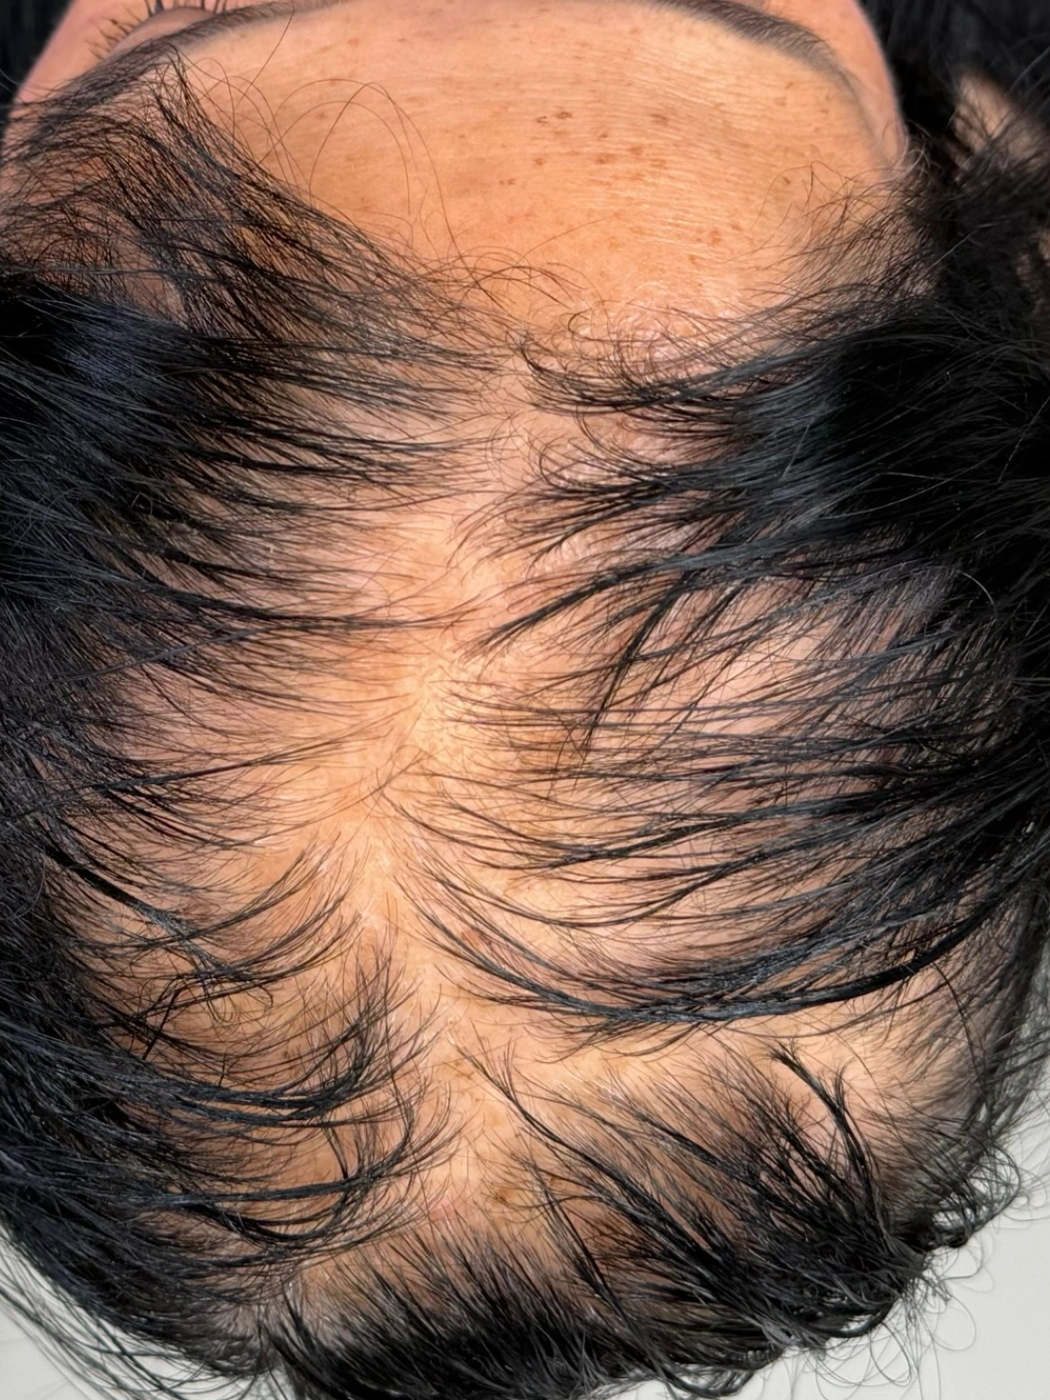
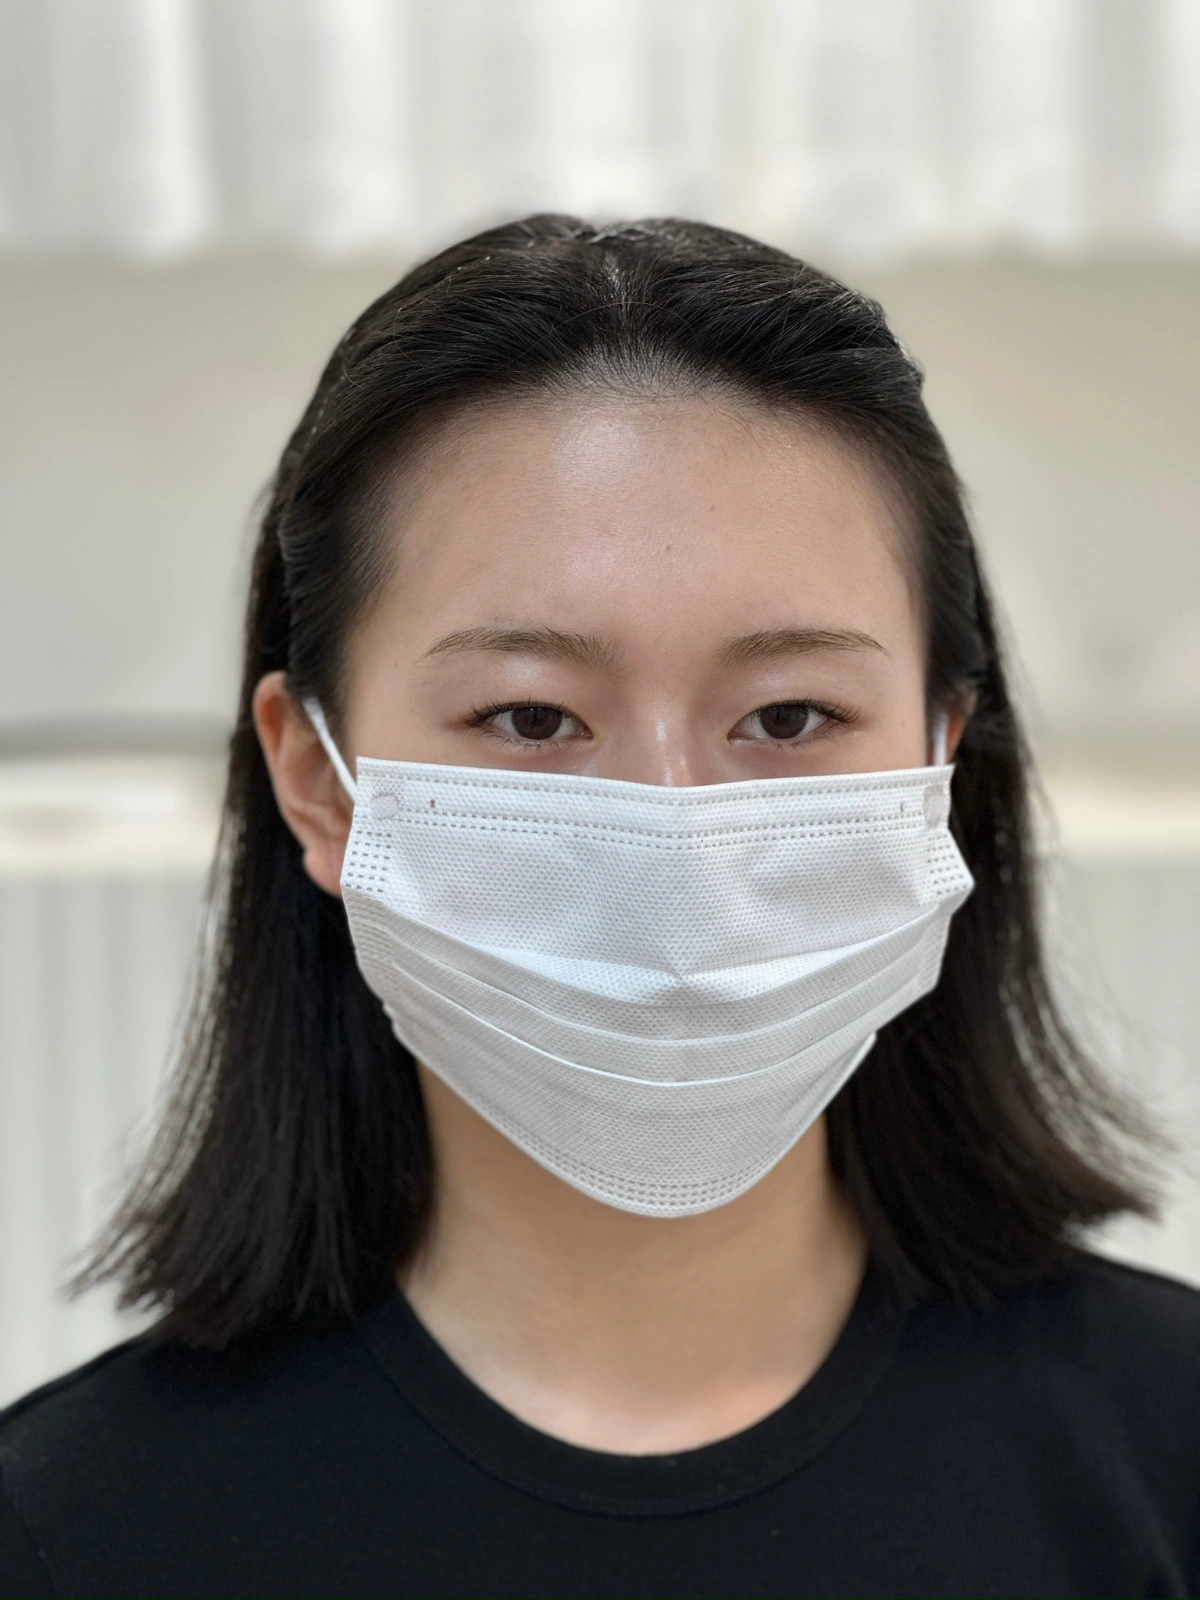
Natural contour
When you want the forehead to appear smaller overall
We lower the contour evenly along the existing hairline, softening its edge with a fine-hair effect.
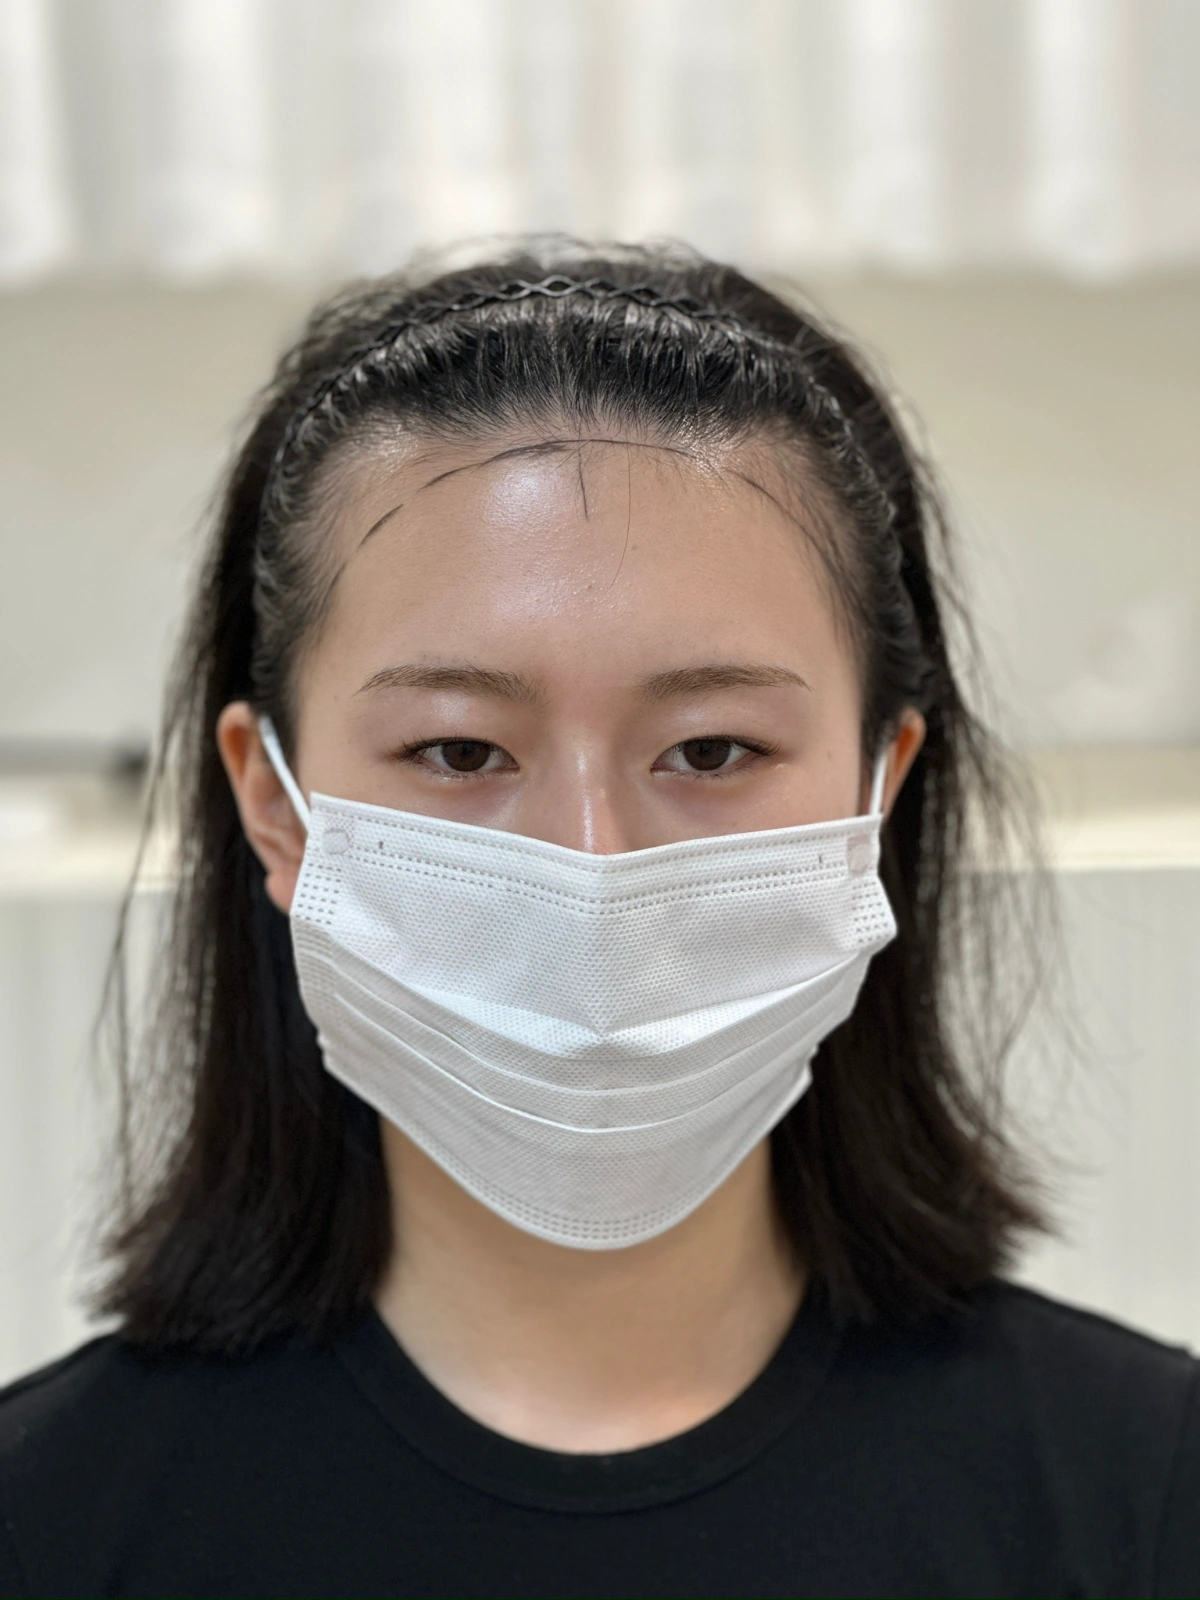
Receding corner fill
When only the corners are receding
We fill the recessed corners to refine the overall contour. For men, we retain a natural degree of recession.
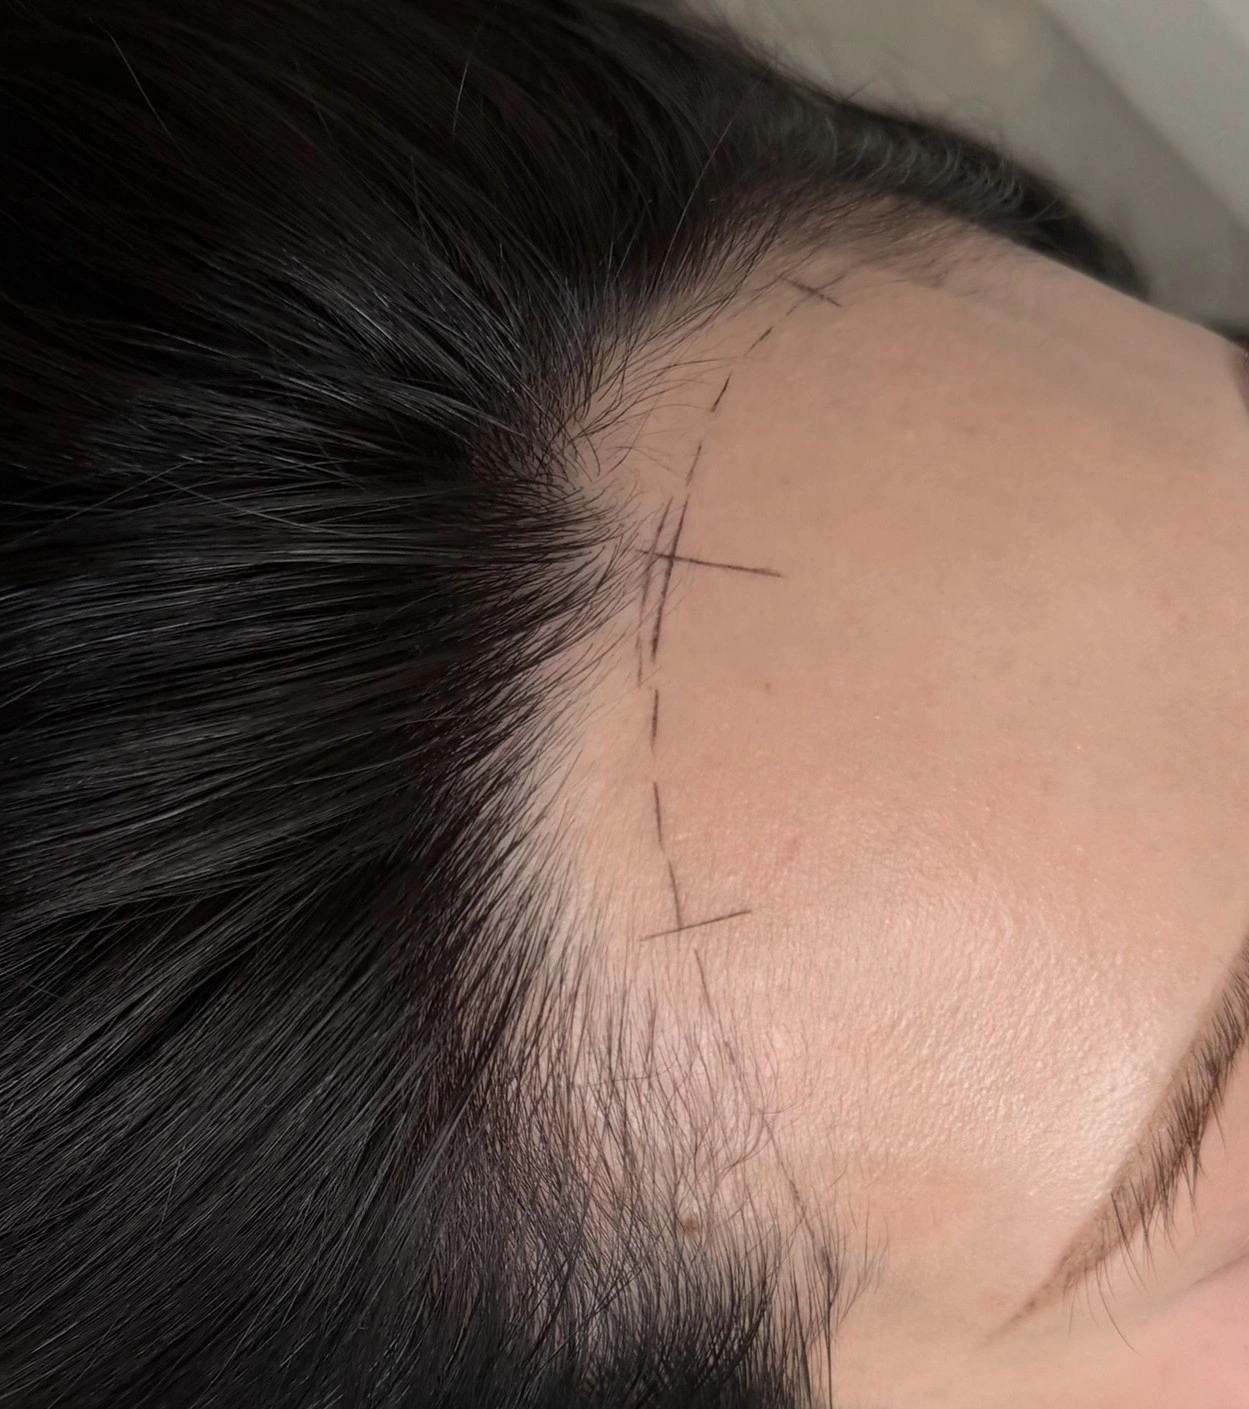
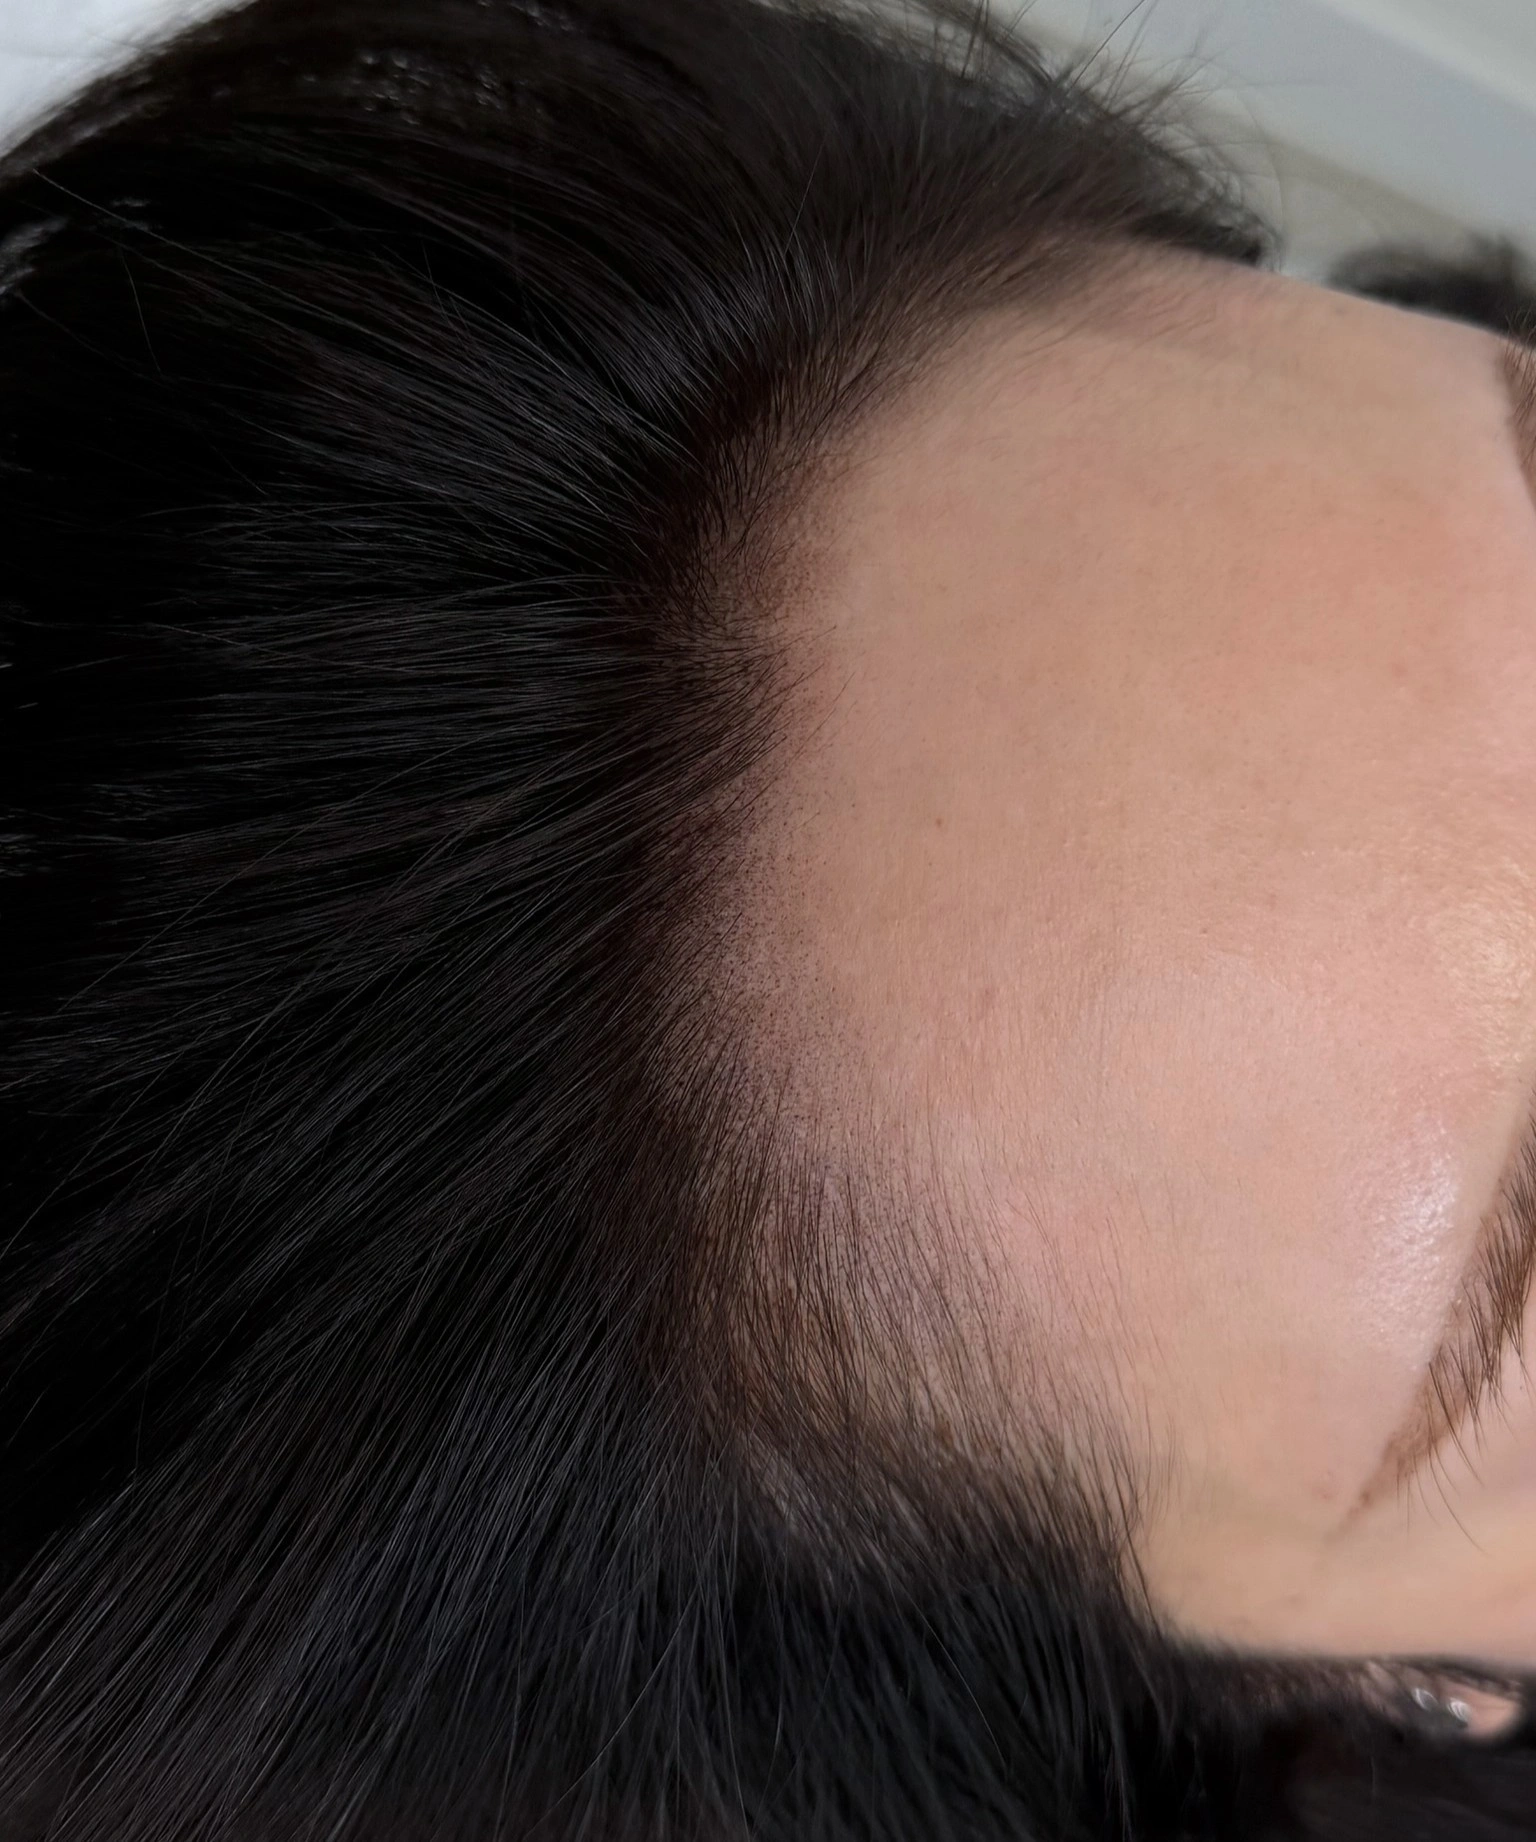
Rounded contour
When you want a softer facial impression
We soften an angular hairline into a rounded contour.
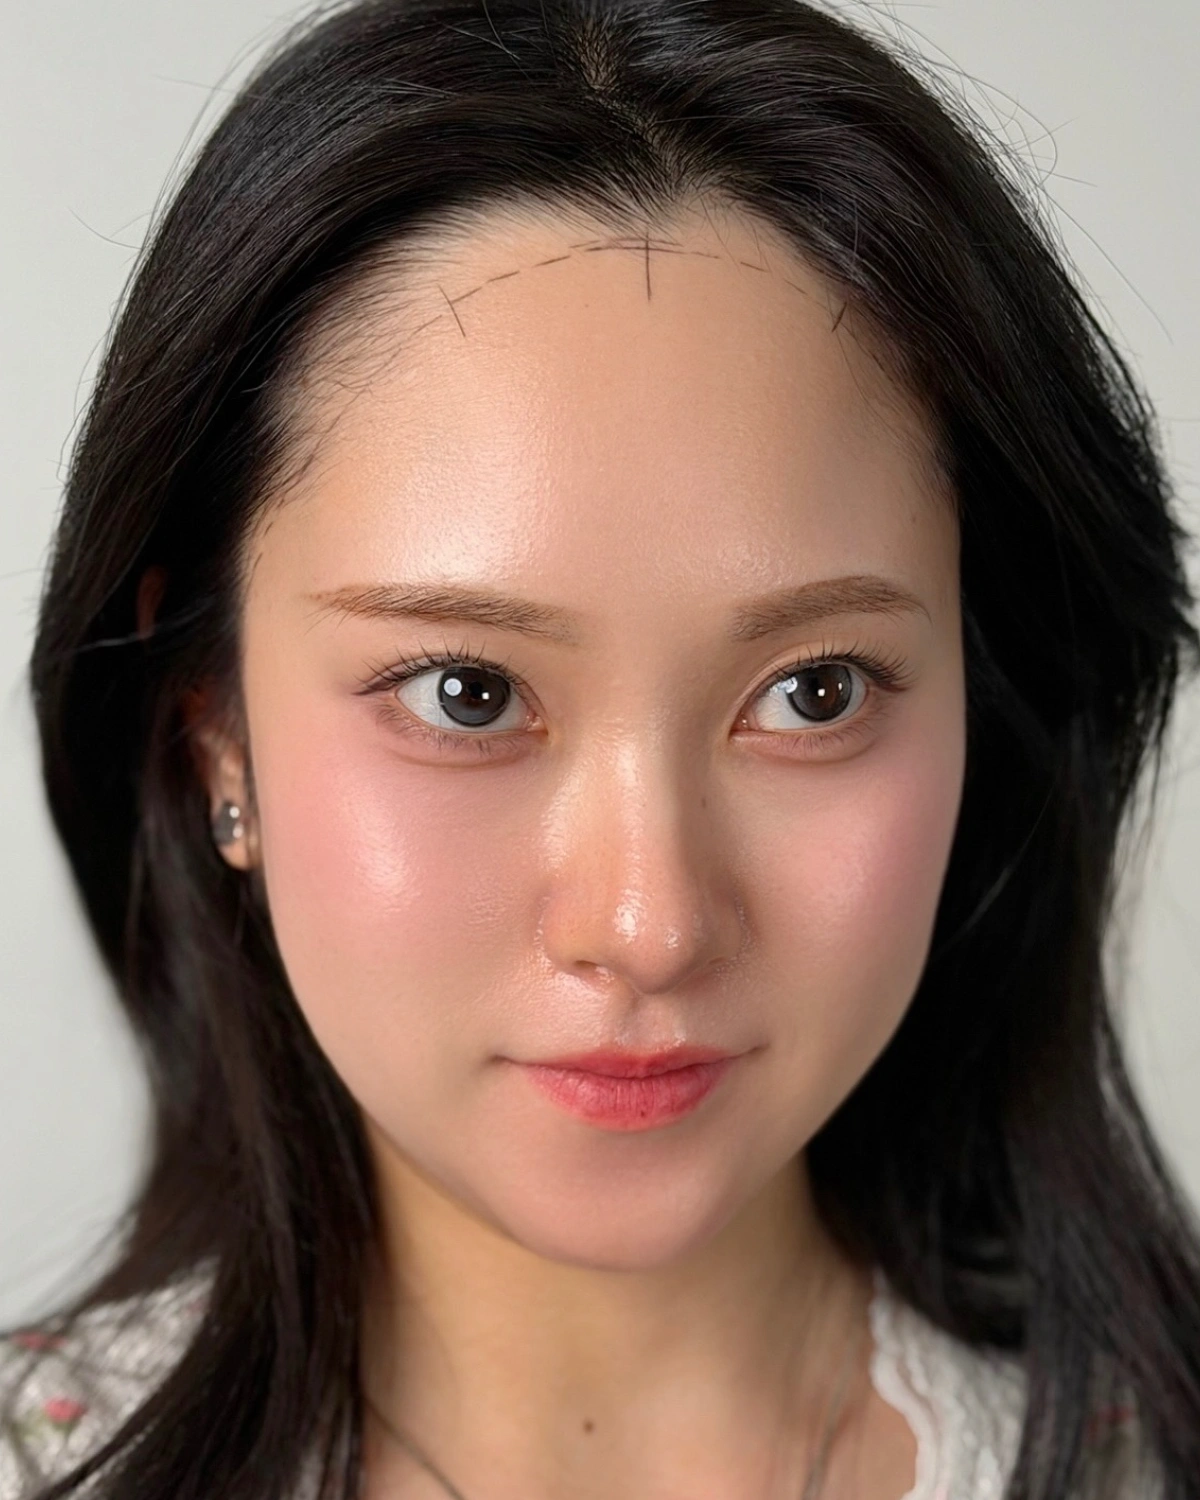
Soft shading
When you want only a very subtle adjustment
We use a much lighter density to leave a soft shadow. It suits those who want a discreet result.
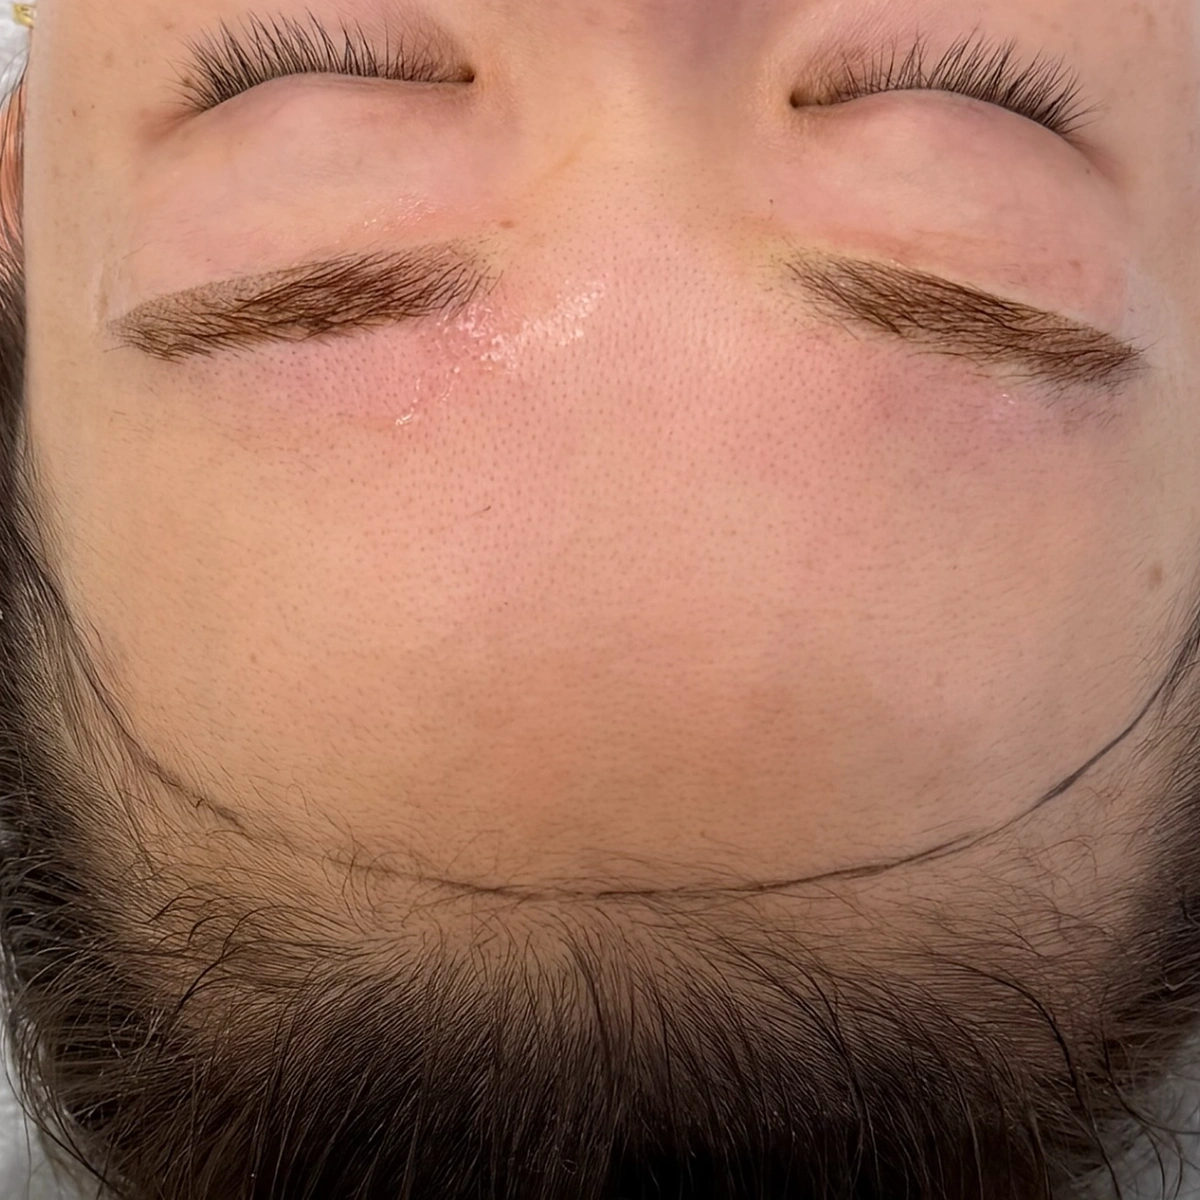
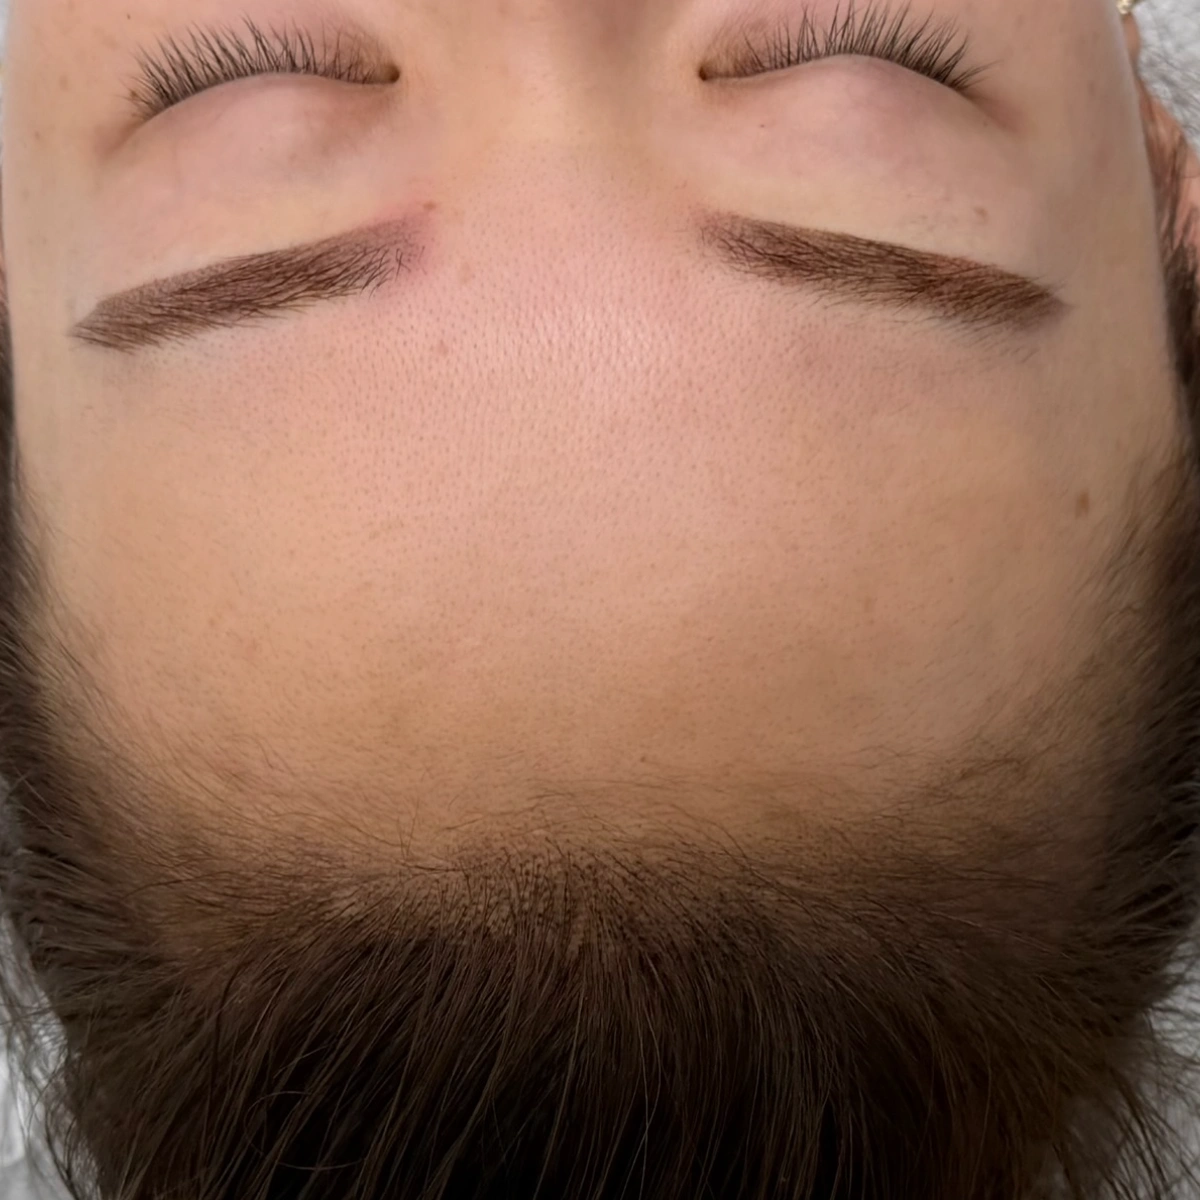
Matching dots and density to existing hair
A natural-looking hairline depends on five details
Can hairline micropigmentation look discreet?
A natural result needs a soft edge.
A natural hairline is not as straight as a ruler. It begins with fine hairs and gradually becomes denser further back.
At CYAN, we do not draw a solid new line across the forehead. The front stays light, with increasing density toward the existing hair for a natural blend.
Even up close, it should be difficult to identify where the treatment begins. That is CYAN's approach to a natural-looking hairline.
How do you choose a hairline for my face shape?
We assess the proportions and bone structure of the whole face, not just the forehead.
Lowering the hairline does not automatically make a face look smaller. Forehead height and width, temple hollows, head shape and facial structure vary from person to person.
At CYAN in Hongdae, Seoul, we consider the distance from the brows to the hairline alongside the face's vertical and horizontal proportions. This guides whether to fill the corners, connect the temples or adjust the overall contour.
We look for the position that makes your face appear most balanced and compact, rather than following a fashionable hairline shape.
How do you fill receding corners and sparse areas?
New coverage must blend naturally with existing hair.
Large, dark dots can look detached on a scalp with fine hair. Black pigment beside light hair can make the treated area stand out.
We consider remaining hair thickness and colour, scalp tone and current density when adjusting dot size, spacing and intensity. At the corners or temples, we vary density naturally instead of repeating identical dots.
The aim is a hairline that looks as though you naturally had a little more hair, rather than a scalp covered in visible dots.
Why use a powder technique instead of hair-like lines?
So that the colour can fade softly, like a natural shadow.
Some techniques draw individual hair-like strokes. Depending on skin type and time, these lines can blur or appear to merge.
CYAN's powder hairline technique builds layers of tiny dots to softly fill sparse areas. Up close they are small dots; from an everyday distance they resemble a natural shadow beneath the existing hair.
As the colour fades, we aim for the overall shading to soften rather than leave thick lines.
How does it look after healing?
We design for healed colour and density, not just the treatment day.
The colour looks darkest immediately after treatment. It softens and settles during healing, so applying too much density at once can leave a heavy-looking edge later.
We start with light density and build gradually. After healing, we check the remaining colour and its transition into existing hair, then touch up only where needed.
If hair loss is ongoing, we also consider how the treated area may look as more hair is lost when deciding on coverage and density.
From consultation to aftercare
Your appointment, step by step
- 01
Consultation
We assess hair-loss patterns, hair colour and scalp tone to decide where and how much to fill.
- 02
Cleansing and disinfection
We prepare the scalp. Excess oil can interfere with pigment placement.
- 03
Before photographs
We record the front, sides and crown from consistent angles as a reference between sessions.
- 04
Equipment preparation
We prepare disinfected equipment and single-use supplies.
- 05
Design check ①
We draw the proposed hairline height and shape and review it together.
- 06
Pigment intensity test
We match the intensity to the remaining hair colour. Too much darkness can look obvious.
- 07
First session
We establish the edge and build dots. The first session is intentionally light.
- 08
Mid-session check ②, from a distance
We check density in different positions and lighting.
- 09
Mirror check ③
We review the result together in the mirror and fill areas that still look sparse.
- 10
After photographs
We document the result from the same angles.
- 11
Healing guidance
We explain precautions about sweat, hats and washing over the following days.
- 12
Booking the next session
The second session is scheduled 1–2 weeks later. We assess how the previous colour has settled before adding density.
Questions about shaving, sessions and aftercare
Frequently asked questions
Does SMP make hair grow?
No. SMP adds the visual impression of density; it does not grow hair or stop hair loss. The design considers existing hair and the area that looks sparse.
Is scalp micropigmentation visible up close?
Very close up, tiny dots may be visible. What matters is whether they blend with real hair roots rather than standing out on their own.
We check dot size and spreading up close, and overall density and edges from an everyday distance. Coverage starts softly at the front and becomes denser toward the existing hair so the treated area does not appear separate.
Do I need to shave my head?
Not all scalp micropigmentation requires shaving.
When filling visible scalp between existing hairs at the crown or parting, your hair can remain its current length. For shaved-look SMP that recreates short hair roots in a completely bare area, surrounding hair may need to be kept short for a natural appearance.
We advise on shaving after assessing hair length, density and the treatment area.
Will scalp micropigmentation grow hair?
Scalp micropigmentation does not grow hair or stop hair loss; it is not a treatment like a hair transplant.
Instead of transplanting actual hair, it uses tiny dots and shading to reduce contrast between the scalp and hair, creating the appearance of greater density. The amount and feel of your hair do not change.
How painful is it?
Repeated fine stimulation can feel like prickling or scratching. Discomfort varies with the area and scalp sensitivity.
For larger areas, we work in stages and check the scalp throughout rather than treating too much at once.
How many sessions will I need?
Scalp micropigmentation usually builds density over 2–3 sessions.
Filling too darkly in the first session can make dots merge or create a heavy edge. We establish a base density first, then assess healed colour and its connection to existing hair before deciding the next session's area and intensity.
The scalp and hairline can be oily, which may affect retention; depth can also affect how lines and dots spread. Technique matters.
Sessions are generally 3–4 weeks apart, although this varies with the scalp and treatment area.
How long does it last?
CYAN scalp micropigmentation generally lasts around 1–2 years, with differences according to skin type, sun exposure, scalp oil and lifestyle.
The overall colour can gradually fade, while faint traces may remain longer. We assess the remaining colour when considering a touch-up.
Can the colour turn blue or the dots spread?
Pigment composition, treatment depth, the amount deposited in one spot, skin condition and sun exposure can affect colour changes and spreading.
We use premium pigments also used in hospitals in the US, Europe and Japan, with formulations intended to slow the shift toward blue tones.
We build small dots gradually, matching scalp tone and the lightness of existing hair, rather than beginning with large dark dots. However, because pigment is placed in the skin, we cannot say that colour changes or spreading are impossible.
Can you camouflage hair-transplant scars or surgical marks?
SMP and scar camouflage can make scars and transplant marks less noticeable, but cannot make them identical to normal skin. The aim is to match colour and reduce their visibility. Scar tissue retains pigment differently from normal scalp.
Depending on a scar's colour, thickness, texture and healing, pigment can fade or spread differently. We assess the tissue first and explain the feasible coverage and expected sessions honestly.
When can I wash my hair or exercise, and how should I care for it?
For two days after treatment, keep water and sweat from directly contacting the treated area.
Cleansing oil reaching the hairline or strong shower pressure directly on the treated area can contribute to colour loss. Avoid exercise, saunas and other activities that cause heavy sweating during healing.
After healing, sun protection helps maintain the colour. For extended time outdoors, protect the area with a hat or a sun-protection product suitable for the scalp.